


Some of us count down in days, others in weeks, and those with big shopping lists – in pay periods!
One of the most fun ways to countdown to Christmas is with an advent calendar. I decided to add a new twist to an old tradition. In this article, I will show you how to make beautiful ‘advent’ boxes.
These boxes also make perfect gift boxes for those ‘great things that come in small packages’ or, fill with chocolates for a wonderful hostess gift.
In our home, we number these boxes and hang them on a garland, but feel free to hang them right in your tree or anywhere else that needs a festive touch.
Step 1
For this particular sized box, I started with a piece of card stock that measures 3 ½” wide by 7” long. This pattern can be adjusted size wise to accommodate larger objects to be placed inside. There are a lot of beautiful patterned papers available at craft stores and even some dollar stores that work well.
Step 2
Fold paper in half length wise. Crease well and unfold.
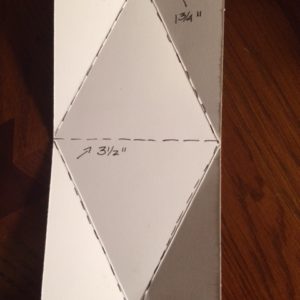
Step 3
Fold paper from outside edge of the center fold to the middle of the end – see illustration. I have drawn the fold lines to indicate. Repeat until you have all four corners folded.
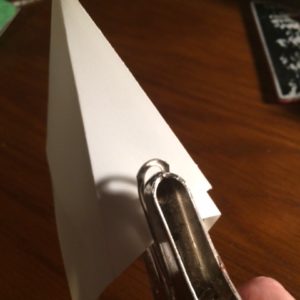
Step 4
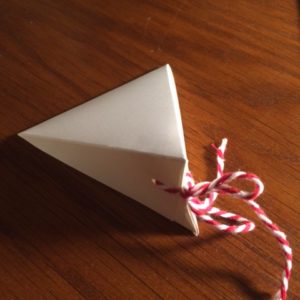
When box is folded closed on one side as shown, use a hole punch and punch holes through both layers. Open punched side, close non-punched side and repeat.
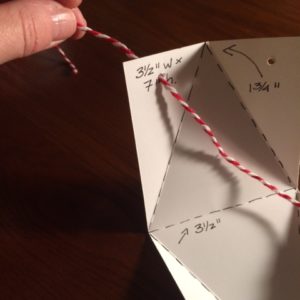
Step 5
Thread thin, decorative ribbon through holes from the inside of the box out. Do not tie off.
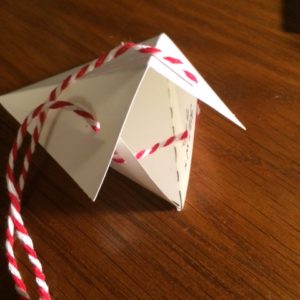
Step 6
Fill box with desired contents and tie off. Make sure your ribbon is long enough to attach to a garland or branch if you are planning on hanging the box up.
Step 7
Decorate as desired. For this example, I used a Bosskut poinsettia die cutter. I alternated layers in two slightly different shades of the same colour and held them together with a gold brad. I then added glue, using a glue pen and some glitter. Coloured glitter glue works great, too.
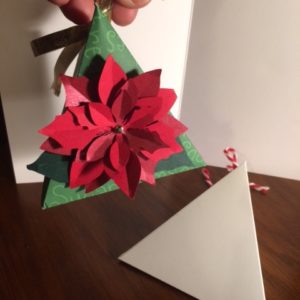
You can also decorate your box with a stampedimage, a printed image from your computer, images from recycled Christmas cards or stickers. Finally, add a number – stickers, stamped or hand-written. There is no wrong way to decorate these triangle boxes. And remember, a touch of glitter always makes things look more festive!
Have fun and happy countdown!
**********************************************
Kat Theus is the marketing manager at Nanaimo Seniors Village and an avid crafter. She often helps with a monthly paper crafting/stamping group at the independent living building.
If you are interested in seeing what some of the Nanaimo Senior Village residents and some outside vendors have made, NSV will be holding their annual craft fair on Thursday, November 23 from 10-3pm at 6089 Uplands Drive, Nanaimo – visitor parking in the back off of Uplands Drive. We would love to see you there!
For more information call Kat at 250-760-2325.
www.retirementconcepts.com/locations/nanaimo-seniors-village


See all articles by Guest Author